Provisioning System
OmniCRM uses Ansible to automate the provisioning, configuration, and deprovisioning of customer services. The provisioning system is designed to be flexible, allowing for complex workflows while maintaining consistency and reliability.
::: note ::: title Note :::
For a complete walkthrough of the product-to-service journey with detailed Ansible playbook examples, pricing strategies, and real-world scenarios, see Complete Product Lifecycle Guide . :::
Overview
When a product is ordered or a service needs to be configured, OmniCRM creates a Provisioning Job that executes one or more Ansible playbooks. These playbooks interact with various backend systems (OCS/CGRateS, network equipment, APIs, etc.) to fully provision the service.
The provisioning system supports two main workflows:
- Standard Provisioning - Triggered by staff or customers through the UI/API
- Simple Provisioning - Triggered by external systems like OCS for automated operations
Provisioning Status Values
Provisioning jobs and individual tasks can have the following statuses:
- Status 0 (Success) - The provisioning job completed successfully
- Status 1 (Running) - The provisioning job or task is currently executing
- Status 2 (Failed - Critical) - A critical failure occurred that caused the provisioning to fail
- Status 3 (Failed - Ignored) - A task failed but had
ignore_errors: true, so provisioning continued
When a provisioning job fails, OmniCRM sends email notifications to the configured failure notification list with detailed error information.
How Products Drive Provisioning
The Product definition is the blueprint for what gets provisioned and how. When a user selects a product to provision, the system reads several key fields from the product definition to determine what to do.
Product Fields Used in Provisioning
A product definition contains:
provisioning_play- The name of the Ansible playbook to execute (without the .yaml extension)provisioning_json_vars- JSON string containing default variables to pass to Ansibleinventory_items_list- List of inventory types that must be assigned (e.g.,['SIM Card', 'Mobile Number'])product_id,product_name, pricing fields - Automatically passed to the playbook
Example Product Definition
{
  "product_id": 1,
  "product_slug": "Mobile-SIM",
  "product_name": "Mobile SIM Only",
  "provisioning_play": "play_psim_only",
  "provisioning_json_vars": "{\"iccid\": \"\", \"msisdn\": \"\"}",
  "inventory_items_list": "['SIM Card', 'Mobile Number']",
  "retail_cost": 0,
  "retail_setup_cost": 0,
  "wholesale_cost": 3,
  "wholesale_setup_cost": 1
}
From Product to Provisioning Job
When provisioning is initiated, the system:
-
Loads the playbook specified in
provisioning_playThe system looks for
OmniCRM-API/Provisioners/plays/play_psim_only.yaml -
Merges variables from multiple sources into
extra_vars:a. From provisioning_json_vars:
{"iccid": "", "msisdn": ""}b. From request body: Any additional variables the user/API provides c. From product fields:product_id,customer_id, etc. d. From authentication:access_tokenor setup forrefresh_token -
Assigns inventory based on
inventory_items_listBefore running the playbook, the UI/API prompts for inventory selection:
- SIM Card - User selects an available SIM from inventory
- Mobile Number - User selects an available phone number
The selected inventory IDs are added to
extra_varswith the inventory type as the key:extra_vars = {
"product_id": 1,
"customer_id": 456,
"SIM Card": 789, # inventory_id of selected SIM
"Mobile Number": 101, # inventory_id of selected phone number
"iccid": "", # From provisioning_json_vars
"msisdn": "", # From provisioning_json_vars
"access_token": "eyJ..."
} -
Passes everything to Ansible via
hostvars[inventory_hostname]Inside the playbook, variables are accessible as:
- name: Get inventory_id for SIM Card
  set_fact:
    inventory_id_sim_card: "{{ hostvars[inventory_hostname]['SIM Card'] | int }}"
  when: "'SIM Card' in hostvars[inventory_hostname]"
How Playbooks Use Inventory Variables
Once the playbook has the inventory IDs, it retrieves the full inventory details from the API:
- name: Get SIM Card Details from Inventory
  uri:
    url: "{{ crm_config.crm.base_url }}/crm/inventory/inventory_id/{{ inventory_id_sim_card }}"
    method: GET
    headers:
      Authorization: "Bearer {{ access_token }}"
    return_content: yes
  register: sim_card_response

- name: Extract ICCID and IMSI from inventory
  set_fact:
    iccid: "{{ sim_card_response.json.iccid }}"
    imsi: "{{ sim_card_response.json.imsi }}"

- name: Get Phone Number Details from Inventory
  uri:
    url: "{{ crm_config.crm.base_url }}/crm/inventory/inventory_id/{{ inventory_id_phone_number }}"
    method: GET
    headers:
      Authorization: "Bearer {{ access_token }}"
    return_content: yes
  register: phone_number_response

- name: Extract MSISDN
  set_fact:
    msisdn: "{{ phone_number_response.json.msisdn }}"
The playbook can then use these values to:
- Provision the SIM card on the HSS with the IMSI
- Configure the phone number in the billing system
- Assign the inventory items to the customer
- Create the service record with these details
Real-World Example: Mobile SIM Provisioning
From play_psim_only.yaml, here's how it uses product and inventory
data:
- name: Get Product information from CRM API
  uri:
    url: "{{ crm_config.crm.base_url }}/crm/product/product_id/{{ product_id }}"
    method: GET
    headers:
      Authorization: "Bearer {{ access_token }}"
    return_content: yes
  register: api_response_product

- name: Set package facts from product
  set_fact:
    package_name: "{{ api_response_product.json.product_name }}"
    package_comment: "{{ api_response_product.json.comment }}"
    setup_cost: "{{ api_response_product.json.retail_setup_cost }}"
    monthly_cost: "{{ api_response_product.json.retail_cost }}"

- name: Set inventory_id_sim_card if SIM Card was selected
  set_fact:
    inventory_id_sim_card: "{{ hostvars[inventory_hostname]['SIM Card'] | int }}"
  when: "'SIM Card' in hostvars[inventory_hostname]"

- name: Set inventory_id_phone_number if Mobile Number was selected
  set_fact:
    inventory_id_phone_number: "{{ hostvars[inventory_hostname]['Mobile Number'] | int }}"
  when: "'Mobile Number' in hostvars[inventory_hostname]"

- name: Get SIM Card details from inventory
  uri:
    url: "{{ crm_config.crm.base_url }}/crm/inventory/inventory_id/{{ inventory_id_sim_card }}"
    method: GET
    headers:
      Authorization: "Bearer {{ access_token }}"
    return_content: yes
  register: sim_inventory_response

- name: Get Phone Number details from inventory
  uri:
    url: "{{ crm_config.crm.base_url }}/crm/inventory/inventory_id/{{ inventory_id_phone_number }}"
    method: GET
    headers:
      Authorization: "Bearer {{ access_token }}"
    return_content: yes
  register: phone_inventory_response

- name: Extract values from inventory
  set_fact:
    iccid: "{{ sim_inventory_response.json.iccid }}"
    imsi: "{{ sim_inventory_response.json.imsi }}"
    msisdn: "{{ phone_inventory_response.json.msisdn }}"
    ki: "{{ sim_inventory_response.json.ki }}"
    opc: "{{ sim_inventory_response.json.opc }}"

- name: Provision subscriber on HSS
  uri:
    url: "http://{{ hss_server }}/subscriber/{{ imsi }}"
    method: PUT
    body_format: json
    body:
      {
        "imsi": "{{ imsi }}",
        "msisdn": "{{ msisdn }}",
        "ki": "{{ ki }}",
        "opc": "{{ opc }}",
        "enabled": true
      }
    status_code: 200

- name: Assign inventory to customer
  uri:
    url: "{{ crm_config.crm.base_url }}/crm/inventory/inventory_id/{{ inventory_id_sim_card }}"
    method: PATCH
    headers:
      Authorization: "Bearer {{ access_token }}"
    body_format: json
    body:
      {
        "customer_id": {{ customer_id }},
        "item_state": "Assigned"
      }
    status_code: 200
This demonstrates the complete flow:
- Product definition specifies
provisioning_play: "play_psim_only" - Product requires
inventory_items_list: ['SIM Card', 'Mobile Number'] - User selects inventory items during provisioning
- Inventory IDs are passed to playbook as
extra_vars - Playbook retrieves full inventory details from API
- Playbook uses inventory data to configure network equipment
- Playbook marks inventory as assigned to the customer
Rollback and Cleanup: Best Practice Pattern
Critical Best Practice: The same playbook should handle both failed
provision rollback and intentional deprovisioning using Ansible's
block and rescue structure.
Playbook Structure
From play_psim_only.yaml:
- name: OmniCore Service Provisioning 2024
  hosts: localhost
  gather_facts: no
  become: False

  tasks:
    - name: Main block
      block:
        # --- PROVISIONING TASKS ---
        - name: Get Product information
          uri: ...

        - name: Create account in OCS
          uri: ...

        - name: Provision subscriber on HSS
          uri: ...

        - name: Create service record
          uri: ...

        # ... many more provisioning tasks ...

      rescue:
        # --- CLEANUP TASKS ---
        # This section runs when:
        # 1. Any task in the block fails (rollback)
        # 2. action == "deprovision" (intentional cleanup)

        - name: Get Inventory items linked to this service
          uri:
            url: "{{ crm_config.crm.base_url }}/crm/inventory/customer_id/{{ customer_id }}"
            method: GET
          register: inventory_api_response
          ignore_errors: True

        - name: Return inventory to pool
          uri:
            url: "{{ crm_config.crm.base_url }}/crm/inventory/inventory_id/{{ item.inventory_id }}"
            method: PATCH
            body_format: json
            body:
              service_id: null
              customer_id: null
              item_state: "Used"
          with_items: "{{ inventory_api_response.json.data }}"
          ignore_errors: True

        - name: Delete Account from Charging
          uri:
            url: "http://{{ crm_config.ocs.OCS }}/jsonrpc"
            method: POST
            body:
              {
                "method": "ApierV1.RemoveAccount",
                "params": [{
                    "Tenant": "{{ crm_config.ocs.ocsTenant }}",
                    "Account": "{{ service_uuid }}"
                }]
              }
          ignore_errors: True

        - name: Delete Attribute Profile
          uri:
            url: "http://{{ crm_config.ocs.OCS }}/jsonrpc"
            method: POST
            body:
              {
                "method": "APIerSv1.RemoveAttributeProfile",
                "params": [{
                    "ID": "ATTR_ACCOUNT_{{ service_uuid }}"
                }]
              }
          ignore_errors: True

        - name: Remove Resource Profile
          uri: ...
          ignore_errors: True

        - name: Remove Filters
          uri: ...
          ignore_errors: True

        - name: Deprovision Subscriber from HSS
          uri:
            url: "{{ item.key }}/subscriber/{{ item.value.subscriber_id }}"
            method: DELETE
          loop: "{{ hss_subscriber_data | dict2items }}"
          ignore_errors: True
          when:
            - deprovision_subscriber | bool == true

        - name: Patch Subscriber to Dormant State
          uri:
            url: "{{ item.key }}/subscriber/{{ item.value.subscriber_id }}"
            method: PATCH
            body:
              {
                "enabled": true,
                "msisdn": "9999{{ imsi[-10:] }}",  # Dummy number
                "ue_ambr_dl": 9999999,              # Unusably high
                "ue_ambr_ul": 9999999
              }
          loop: "{{ hss_subscriber_data | dict2items }}"
          when:
            - deprovision_subscriber | default(false) | bool == false

        # Final assertion determines success or failure
        - name: Set status to "Success" if Manual deprovision / Fail if failed provision
          assert:
            that:
              - action == "deprovision"
Why This Pattern is Best Practice
1. No Code Duplication
The same cleanup tasks handle both scenarios:
- Failed Provision (Rollback): If any task in the
blockfails, therescuesection executes automatically - Intentional Deprovision: When called with
action: "deprovision", the playbook immediately jumps torescue
2. Complete Cleanup Guaranteed
When a provision fails partway through, the rescue section ensures:
- All created OCS accounts are deleted
- All configured network equipment entries are removed
- Assigned inventory is returned to the pool
- HSS subscribers are deleted or set to dormant
- No partial provisioning remains in any system
This prevents "orphaned" resources that:
- Consume inventory without being tracked
- Create billing accounts that aren't linked to services
- Cause confusion during troubleshooting
- Waste network resources
3. Graceful Failure Handling with ignore_errors
Notice every cleanup task uses ignore_errors: True. This is
intentional because:
- During rollback, some resources may not have been created yet
- We want to attempt all cleanup tasks even if some fail
- The final assertion determines overall success/failure
For example, if provisioning fails at "Create account in OCS", the cleanup will try to:
- Delete the OCS account (will fail, but ignored)
- Remove attribute profiles (will fail, but ignored)
- Return inventory (succeeds)
- Delete HSS subscriber (may not exist, ignored)
4. Distinguishing Deprovision from Rollback
The final assertion at the end of rescue is clever:
- name: Set status to "Success" if Manual deprovision / Fail if failed provision
  assert:
    that:
      - action == "deprovision"
This means:
- If ``action == "deprovision"``: Assertion passes, playbook succeeds (status 0)
- If ``action`` is not set or != "deprovision": Assertion fails, playbook fails (status 2)
So the same cleanup code results in different provisioning job statuses depending on intent.
5. Conditional Cleanup Based on Service Type
Some cleanup tasks use conditionals to handle different scenarios:
- name: Deprovision Subscriber from HSS
  uri: ...
  when:
    - deprovision_subscriber | bool == true

- name: Patch Subscriber to Dormant State
  uri: ...
  when:
    - deprovision_subscriber | default(false) | bool == false
This allows for flexible cleanup:
- Full deletion: When SIMs are dedicated to customers
(
deprovision_subscriber: true) - Dormant state: When SIMs are reusable and should remain in HSS
(
deprovision_subscriber: false)
How to Use This Pattern
For Provisioning:
{
  "product_id": 1,
  "customer_id": 456,
  "provisioning_play": "play_psim_only"
}
If provisioning fails, automatic rollback occurs via rescue.
For Deprovisioning:
{
  "service_id": 123,
  "service_uuid": "Service_abc123",
  "action": "deprovision",
  "provisioning_play": "play_psim_only"
}
The playbook skips directly to rescue section, runs all cleanup, and
succeeds.
Benefits Summary
✅ Single source of truth: One playbook handles provision and
deprovision ✅ Atomic operations: Either fully provisioned or fully
cleaned up ✅ No orphaned resources: Failed provisions leave no
trace ✅ Easier maintenance: Changes to provisioning logic
automatically apply to cleanup ✅ Reduced errors: No chance of
provision and deprovision code getting out of sync ✅ Testable: Can
test deprovision logic by running with action: "deprovision"
This pattern should be followed in all provisioning playbooks to ensure reliability and consistency.
Overriding Product Variables
The provisioning_json_vars can be overridden at provision time. For
example, a product might define:
{
  "provisioning_json_vars": "{\"monthly_cost\": 50, \"data_limit_gb\": 100}"
}
But when provisioning, you can override these:
{
  "product_id": 1,
  "customer_id": 456,
  "monthly_cost": 45,
  "data_limit_gb": 150
}
The merged extra_vars will use the overridden values. This allows for:
- Custom pricing for specific customers
- Different data limits based on promotions
- Testing with different parameters without modifying the product
Products Without Inventory
Not all products require inventory. For example, a data addon or a feature toggle might have:
{
  "product_id": 10,
  "product_name": "Extra 10GB Data",
  "provisioning_play": "play_local_data_addon",
  "provisioning_json_vars": "{\"data_gb\": 10}",
  "inventory_items_list": "[]"
}
In this case, the playbook receives:
extra_vars = {
    "product_id": 10,
    "customer_id": 456,
    "service_id": 123,  # Service to add data to
    "data_gb": 10,
    "access_token": "eyJ..."
}
The playbook simply adds the data to the existing service without needing any inventory items.
Standard Provisioning Workflow
Standard provisioning is initiated when:
- A staff member adds a service to a customer from the UI
- A customer orders a service through the self-care portal
- The API is called directly with
PUT /crm/provision/
When You Click "Provision"
Here's the complete flow that occurs when a user clicks the "Provision" button:
1. UI Displays Product Selection
User selects a product from the product catalog. Product contains:
provisioning_play- Which Ansible playbook to runinventory_items_list- Required inventory (e.g.,['SIM Card', 'Mobile Number'])provisioning_json_vars- Default variables
2. Inventory Picker (If Required)
If inventory_items_list is not empty, a modal appears showing
dropdowns for each inventory type. User must select available inventory
items before proceeding.
3. Provision Button Clicked
JavaScript sends PUT /crm/provision/ request:
PUT /crm/provision/
Authorization: Bearer eyJhbGciOiJIUzI1NiIsInR5cCI6IkpXVCJ9...
Content-Type: application/json

{
  "product_id": 42,
  "customer_id": 123,
  "SIM Card": 5001,
  "Mobile Number": 5002
}
4. API Receives Request
The provisioning endpoint (routes/provisioning.py):
- Validates authentication (Bearer token, API key, or IP whitelist)
- Checks user has
CREATE_PROVISIONpermission - Extracts
initiating_userfrom token - Loads product definition from database
- Retrieves playbook path:
OmniCRM-API/Provisioners/plays/play_psim_only.yaml
5. Variables Merged
System combines variables from multiple sources:
# From product
product_vars = json.loads(product['provisioning_json_vars'])
# From request body
request_vars = request.json
# System-added
system_vars = {
    'product_id': 42,
    'customer_id': 123,
    'access_token': g.access_token,  # See authentication section below
    'initiating_user': 7
}
# Final merged
extra_vars = {**product_vars, **request_vars, **system_vars}
6. Provision Record Created
Database record created with status 1 (Running):
provision = {
    'provision_id': 456,
    'customer_id': 123,
    'product_id': 42,
    'provisioning_play': 'play_psim_only',
    'provisioning_json_vars': json.dumps(extra_vars),
    'provisioning_status': 1,  # Running
    'task_count': 85,
    'initiating_user': 7,
    'created': '2025-01-10T14:30:00Z'
}
7. Background Thread Spawned
run_playbook_in_background(
    playbook='plays/play_psim_only.yaml',
    extra_vars=extra_vars,
    provision_id=456,
    refresh_token=refresh_token  # For token refresh during execution
)
8. API Returns Immediately
Response returned to UI with provision_id:
{
  "provision_id": 456,
  "provisioning_status": 1,
  "message": "Provisioning job created"
}
9. UI Polls for Updates
UI starts polling GET /crm/provision/provision_id/456 every 3 seconds
to check status. The response includes:
{
  "provision_id": 456,
  "provisioning_status": 1,
  "task_count": 12,
  "provisioning_result_json": [
    {
      "event_number": 1,
      "event_name": "Get Product information from CRM API",
      "provisioning_status": 0,
      "timestamp": "2024-01-15T10:30:05"
    },
    {
      "event_number": 2,
      "event_name": "Assign SIM Card from inventory",
      "provisioning_status": 1,
      "timestamp": "2024-01-15T10:30:07"
    }
  ]
}
10. Ansible Executes in Background
Playbook runs tasks sequentially:
- Each task completion creates
Provision_Eventrecord in database - Event includes: task name, status (0=success, 2=failed, 3=failed but ignored), result JSON
- UI displays real-time progress showing completed tasks and currently running task
- Failed tasks show error messages in the event details
Tracking in the UI:
While provisioning is running (status 1), users can view:
- Service Details Page - Shows provisioning status badge (Running/Success/Failed)
- Activity Log - Lists all provisioning events with timestamps
- Provision Details View - Shows task-by-task progress with expand/collapse for details
Example display:
Provisioning Status: Running (8 of 12 tasks completed)
✓ Get Product information from CRM API ✓ Fetch Customer details ✓ Assign SIM Card from inventory (ICCID: 8991101200003204510) ✓ Assign Mobile Number (555-0123) ⟳ Create account in OCS/CGRateS (in progress...) ⏺ Configure network policies ⏺ Create service record ...
11. Provisioning Completes
Final status set:
provisioning_status: 0- Successprovisioning_status: 2- Failed (critical error)
UI stops polling and displays result:
- Success: Green checkmark, service marked Active, user can view service details
- Failure: Red X, error message displayed, option to retry or contact support
- Email notification: If failure, email sent to
provisioning.failure_listin config
Authentication and Authorization
User Tracking
Every provisioning job tracks which user initiated it:
- User-initiated: The
initiating_userfield is set to the user's ID from their JWT token - API Key auth: Uses the first admin user ID
- IP whitelist auth: Uses the first admin user ID
Permission Checks
The system checks permissions before allowing provisioning:
- Staff need the
CREATE_PROVISIONpermission - Customers can only provision services for their own account
(
VIEW_OWN_PROVISIONpermission)
How Ansible Authenticates with the CRM API
Ansible playbooks need to make authenticated API calls back to the CRM (to fetch product details, create services, update inventory, etc.). Authentication is handled through Bearer tokens passed to the playbook.
The source of the access_token depends on the authentication method
used to call the provisioning API:
Method 1: User Login (Bearer Token)
When a user logs in via web UI:
- User authenticates:
POST /crm/auth/login - Receives JWT
access_token(short-lived, 15-30 min) andrefresh_token(long-lived) - Makes provisioning request with Bearer token in header
- Provisioning API extracts token from
Authorization: Bearer ...header - Stores in
g.access_token(Flask request context) - Passes to Ansible as
access_tokenvariable
Code (permissions.py):
# Extract Bearer token from header
auth_header = request.headers.get('Authorization', '')
if auth_header.startswith('Bearer '):
    bearer_token = auth_header[7:]
    # Validate and decode
    decoded_token = jwt.decode(bearer_token, secret_key, algorithms=['HS256'])
    # Store for provisioning
    g.access_token = bearer_token
Code (provisioning.py):
if "access_token" in g:
    json_data['access_token'] = g.access_token
run_playbook(playbook_path, extra_vars=json_data, provision_id=provision_id)
Method 2: API Key (X-API-KEY Header)
For automated systems using API keys:
- System makes request:
PUT /crm/provision/withX-API-KEY: your-api-key...header - Provisioning API validates API key against
crm_config.yaml - Generates a new JWT token on-the-fly for the first admin user
- Stores in
g.access_token - Passes to Ansible
Why Generate a Token?
API keys are strings, not JWTs. Playbooks call API endpoints expecting JWT authentication. So:
- Validate API key
- If valid and has
adminrole, generate temporary JWT - Use first admin user's ID as JWT subject
- Token allows playbook to make authenticated API calls
Code (permissions.py):
def handle_api_key_auth(f, api_key, *args, **kwargs):
    if not secure_compare_api_key(api_key):
        return {'message': 'Invalid API key'}, 401

    API_KEYS = yaml_config.get('api_keys', {})
    if api_key in API_KEYS:
        if 'admin' in API_KEYS[api_key].get('roles', []):
            admin_user_id = retrieve_first_admin_user_id()
            access_token = create_access_token(identity=str(admin_user_id))
            g.access_token = access_token
Method 3: IP Whitelist
For trusted internal systems on private networks:
- System makes request from whitelisted IP (e.g., 192.168.1.100)
- Provisioning API checks client IP against
ip_whitelistincrm_config.yaml - If whitelisted, generates a new JWT token for first admin user
- Stores in
g.access_token - Passes to Ansible
Code (permissions.py):
def handle_ip_auth(f, *args, **kwargs):
    client_ip = get_real_client_ip()
    if not is_ip_whitelisted(client_ip):
        return {'message': 'Access denied'}, 403

    admin_user_id = retrieve_first_admin_user_id()
    access_token = create_access_token(identity=str(admin_user_id))
    g.access_token = access_token
Using the Token in Playbooks
Every API call in the playbook includes the token:
- name: Get Product Details
  uri:
    url: "http://localhost:5000/crm/product/product_id/{{ product_id }}"
    headers:
      Authorization: "Bearer {{ access_token }}"

- name: Create Service Record
  uri:
    url: "http://localhost:5000/crm/service/"
    method: PUT
    headers:
      Authorization: "Bearer {{ access_token }}"
    body:
      customer_id: "{{ customer_id }}"
      service_name: "Mobile Service"
Token Expiration and Refresh
Long-running playbooks (5-10 minutes) may outlive the access_token
(15-30 min expiry). For user-initiated provisions, the system passes
both access_token and refresh_token:
refresh_token = request.cookies.get('refresh_token')
run_playbook(playbook_path, extra_vars, provision_id, refresh_token=refresh_token)
If access_token expires, the playbook runner can:
- Detect 401 Unauthorized response
- Call
POST /crm/auth/refreshwithrefresh_token - Receive new
access_token - Retry failed request
For API key/IP whitelist auth, generated tokens can have longer expiration (1-2 hours) since these are trusted automated systems.
The Provisioning Process
-
Job Creation
When a provisioning request is received, the system:
- Validates the request and checks permissions
- Loads the Ansible playbook specified in the product definition
- Creates a
Provisionrecord in the database with status 1 (Running) - Extracts variables from the product definition and request body
- Captures authentication tokens for API access
-
Token Handling
Ansible playbooks need to authenticate with the CRM API to retrieve data and make changes. The provisioning system handles this in two ways:
- Bearer Token (JWT): For user-initiated provisioning, the
refresh_tokenfrom the request is used to generate fresh access tokens during playbook execution - API Key/IP Auth: For automated systems, an
access_tokenis passed directly to the playbook viag.access_token
- Bearer Token (JWT): For user-initiated provisioning, the
-
Background Execution
The playbook runs in a background thread using
playbook_runner_v2. This allows the API to return immediately while provisioning continues asynchronously.During execution:
- Each task completion/failure creates a
Provision_Eventrecord - The event handler monitors for critical vs. ignored failures
- Real-time status updates are written to the database
- The UI can poll for updates via
GET /crm/provision/provision_id/<id>
- Each task completion/failure creates a
-
Playbook Execution
The Ansible playbook typically performs these operations:
- Retrieves product information from the API
- Retrieves customer information from the API
- Assigns inventory items (SIM cards, IP addresses, phone numbers, etc.)
- Creates accounts in OCS/OCS
- Configures network equipment
- Creates the service record in the CRM API
- Adds setup cost transactions
- Sends welcome emails/SMS to customers
-
Error Handling
Ansible playbooks use
blockandrescuesections for rollback:- If a critical task fails, the rescue section removes partial provisioning
- Tasks with
ignore_errors: trueare marked as status 3 and don't fail the job - Fatal errors (YAML syntax, connection failures) create a special error event with debugging information
Example: Standard Provisioning Playbook
Here's an example from play_simple_service.yaml:
- name: Simple Provisioning Play
  hosts: localhost
  gather_facts: no
  become: False

  tasks:
    - name: Main block
      block:
      - name: Get Product information from CRM API
        uri:
          url: "http://localhost:5000/crm/product/product_id/{{ product_id }}"
          method: GET
          headers:
            Authorization: "Bearer {{ access_token }}"
          return_content: yes
          validate_certs: no
        register: api_response_product

      - name: Set package facts
        set_fact:
          package_name: "{{ api_response_product.json.product_name }}"
          setup_cost: "{{ api_response_product.json.retail_setup_cost }}"
          monthly_cost: "{{ api_response_product.json.retail_cost }}"

      - name: Generate Service UUID
        set_fact:
          service_uuid: "Service_{{ 99999999 | random | to_uuid }}"

      - name: Create account in OCS
        uri:
          url: "http://{{ crm_config.ocs.OCS }}/jsonrpc"
          method: POST
          body_format: json
          body:
            {
              "method": "ApierV2.SetAccount",
              "params": [{
                  "Tenant": "{{ crm_config.ocs.ocsTenant }}",
                  "Account": "{{ service_uuid }}",
                  "ActionPlanIds": [],
                  "ExtraOptions": { "AllowNegative": false, "Disabled": false }
              }]
            }
          status_code: 200
        register: response

      - name: Add Service via API
        uri:
          url: "http://localhost:5000/crm/service/"
          method: PUT
          body_format: json
          headers:
            Authorization: "Bearer {{ access_token }}"
          body:
            {
              "customer_id": "{{ customer_id }}",
              "product_id": "{{ product_id }}",
              "service_name": "Service: {{ service_uuid }}",
              "service_uuid": "{{ service_uuid }}",
              "service_status": "Active",
              "retail_cost": "{{ monthly_cost | float }}"
            }
          status_code: 200
        register: service_creation_response

      - name: Add Setup Cost Transaction
        uri:
          url: "http://localhost:5000/crm/transaction/"
          method: PUT
          headers:
            Authorization: "Bearer {{ access_token }}"
          body_format: json
          body:
            {
              "customer_id": {{ customer_id | int }},
              "service_id": {{ service_creation_response.json.service_id | int }},
              "title": "{{ package_name }} - Setup Costs",
              "retail_cost": "{{ setup_cost | float }}"
            }
        register: api_response_transaction

      rescue:
        - name: Remove account in OCS
          uri:
            url: "http://{{ crm_config.ocs.OCS }}/jsonrpc"
            method: POST
            body_format: json
            body:
              {
                "method": "ApierV2.RemoveAccount",
                "params": [{
                    "Tenant": "{{ crm_config.ocs.ocsTenant }}",
                    "Account": "{{ service_uuid }}"
                }]
              }
            status_code: 200

        - name: Fail the provision
          assert:
            that:
              - false
This playbook demonstrates the typical flow:
- Retrieve product details from the CRM API
- Generate a unique service UUID
- Create the billing account in OCS
- Create the service record via the CRM API
- Add setup cost transactions
- If anything fails, the
rescuesection removes the OCS account
Simple Provisioning Workflow
Simple provisioning is designed for automated systems that need to trigger provisioning without user interaction. The most common use case is OCS triggering addon provisioning via ActionPlans.
Simple Provisioning Endpoints
OmniCRM provides two simple provisioning endpoints:
-
POST /crm/provision/simple_provision_addon/service_id/<id>/product_id/<id>For automated addon provisioning (e.g., recurring charges, automatic top-ups)
-
POST /crm/provision/simple_provision_addon_recharge/service_id/<id>/product_id/<id>For quick recharge operations that need immediate feedback
Authentication for Simple Provisioning
Simple provisioning endpoints use IP whitelisting or API keys for authentication:
- The request's source IP is checked against
ip_whitelistincrm_config.yaml - Or an API key from
api_keysincrm_config.yamlcan be provided - An access token is generated and passed to the playbook via
g.access_token
Example: OCS ActionPlan Callback
OCS can be configured to call the simple provisioning endpoint when executing recurring actions:
{
  "method": "ApierV1.SetActionPlan",
  "params": [{
    "Id": "ActionPlan_Service123_Monthly_Charge",
    "ActionsId": "Action_Service123_Add_Monthly_Data",
    "Timing": {
      "Years": [],
      "Months": [],
      "MonthDays": [1],
      "Time": "00:00:00Z"
    },
    "Weight": 10,
    "ActionTriggers": [
      {
        "ThresholdType": "*min_event_counter",
        "ThresholdValue": 1,
        "ActionsID": "Action_Service123_HTTP_Callback"
      }
    ]
  }]
}
The action makes an HTTP POST to:
This triggers the associated playbook (e.g.,
play_topup_no_charge.yaml) which adds data/credits to the service.
Example: Simple Topup Playbook
From play_topup_monetary.yaml:
- name: Mobile Topup Monetary - 2024
  hosts: localhost
  gather_facts: no
  become: False

  tasks:
    - name: Get Product information from CRM API
      uri:
        url: "http://localhost:5000/crm/product/product_id/{{ product_id }}"
        method: GET
        headers:
          Authorization: "Bearer {{ access_token }}"
        return_content: yes
      register: api_response_product

    - name: Get Service information from CRM API
      uri:
        url: "http://localhost:5000/crm/service/service_id/{{ service_id }}"
        method: GET
        headers:
          Authorization: "Bearer {{ access_token }}"
        return_content: yes
      register: api_response_service

    - name: Set service facts
      set_fact:
        service_uuid: "{{ api_response_service.json.service_uuid }}"
        customer_id: "{{ api_response_service.json.customer_id }}"
        package_name: "{{ api_response_product.json.product_name }}"
        monthly_cost: "{{ api_response_product.json.retail_cost }}"

    - name: Get Customer Payment Method
      uri:
        url: "http://localhost:5000/crm/stripe/customer_id/{{ customer_id }}"
        method: GET
        headers:
          Authorization: "Bearer {{ access_token }}"
        return_content: yes
      register: api_response_stripe

    - name: Charge customer
      uri:
        url: "http://localhost:5000/crm/stripe/charge_card/{{ customer_stripe_id }}"
        method: POST
        headers:
          Authorization: "Bearer {{ access_token }}"
        body_format: json
        body:
          {
            "retail_cost": "{{ monthly_cost }}",
            "description": "{{ package_name }} topup",
            "customer_id": "{{ customer_id | int }}",
            "service_id": "{{ service_id | int }}"
          }
      register: api_response_stripe

    - name: Add monetary balance to OCS
      uri:
        url: "http://{{ crm_config.ocs.OCS }}/jsonrpc"
        method: POST
        body_format: json
        body:
          {
            "method": "ApierV1.AddBalance",
            "params": [{
                "Tenant": "{{ crm_config.ocs.ocsTenant }}",
                "Account": "{{ service_uuid }}",
                "BalanceType": "*monetary",
                "Balance": {
                    "Value": "{{ monthly_cost | float * 100 }}",
                    "ExpiryTime": "+4320h"
                }
            }]
          }
        status_code: 200

    - name: Add Transaction to CRM
      uri:
        url: "http://localhost:5000/crm/transaction/"
        method: PUT
        headers:
          Authorization: "Bearer {{ access_token }}"
        body_format: json
        body:
          {
            "customer_id": {{ customer_id | int }},
            "service_id": {{ service_id | int }},
            "title": "{{ package_name }}",
            "retail_cost": "{{ monthly_cost | float }}"
          }

    - name: Send Notification SMS
      uri:
        url: "http://sms-gateway/SMS/plaintext/{{ api_key }}"
        method: POST
        body_format: json
        body:
          {
            "source_msisdn": "YourCompany",
            "destinatination_msisdn": "{{ customer_phone }}",
            "message_body": "Thanks for topping up {{ monthly_cost }}!"
          }
        status_code: 201
      ignore_errors: True
This playbook:
- Gets service and product details from the API
- Retrieves the customer's payment method
- Charges the customer via Stripe API
- Adds monetary balance to OCS
- Records the transaction in the CRM
- Sends a confirmation SMS (with
ignore_errors: Trueso failures don't fail the job)
Provisioning Chains
For complex products that require multiple provisioning steps, OmniCRM supports provisioning chains. A chain executes multiple playbooks sequentially, passing context between them.
Example use case: A bundled service that provisions:
- Base internet service (creates the primary service record)
- IPTV addon (uses the service_id from step 1)
- Static IP addon (uses the service_id from step 1)
The provisioning service automatically:
- Queries the database for the
service_idcreated by the first playbook - Injects it into the
extra_varsfor subsequent playbooks - Tracks each playbook as a separate
Provisionrecord
Failure Reasons and Debugging
When provisioning fails, the system captures detailed information to help diagnose the issue.
Common Failure Scenarios
Critical Task Failures (Status 2)
These cause the entire provisioning job to fail:
- API calls returning unexpected status codes
- Assertions failing (e.g.,
assert: that: response.status == 200) - Missing required inventory items
- Network equipment unreachable
- Invalid credentials or expired tokens
- OCS/OCS errors
Ignored Failures (Status 3)
These are logged but don't fail the job:
- Optional SMS/email notifications failing
- Non-critical data lookups (marked with
ignore_errors: True) - Cleanup operations during deprovisioning
Fatal Errors
These prevent the playbook from running at all:
- YAML syntax errors in the playbook
- Undefined variables in the playbook
- Missing playbook files
- Connection failures to the Ansible controller
When a fatal error occurs, the system creates a special error event containing:
- The Ansible exit code
- Full stdout (contains syntax error details)
- Full stderr (contains runtime errors)
- A list of common causes for that type of failure
- All variables passed to the playbook
Error Notification Emails
When provisioning fails (status 2), an email is automatically sent to
the configured failure notification list (provisioning.failure_list in
crm_config.yaml).
The email includes:
- Customer information
- Product/service details
- Color-coded task results:
- Green: Successful tasks
- Orange: Failed but ignored tasks
- Red: Critical failures
- For critical failures: Full debug output including request/response bodies
- For fatal errors: Ansible output, error messages, and common causes
Monitoring Provisioning Jobs
Provisioning Status API
To check the status of a provisioning job:
GET /crm/provision/provision_id/<id>
Authorization: Bearer <token>
Response includes:
{
  "provision_id": 123,
  "customer_id": 456,
  "customer_name": "John Smith",
  "product_id": 10,
  "provisioning_status": 0,
  "provisioning_play": "play_psim_only",
  "playbook_description": "OmniCore Service Provisioning 2024",
  "task_count": 85,
  "provisioning_result_json": [
    {
      "event_number": 1,
      "event_name": "Get Product information from CRM API",
      "provisioning_status": 1,
      "provisioning_result_json": "{...}"
    },
    {
      "event_number": 2,
      "event_name": "Create account in OCS",
      "provisioning_status": 1,
      "provisioning_result_json": "{...}"
    }
  ]
}
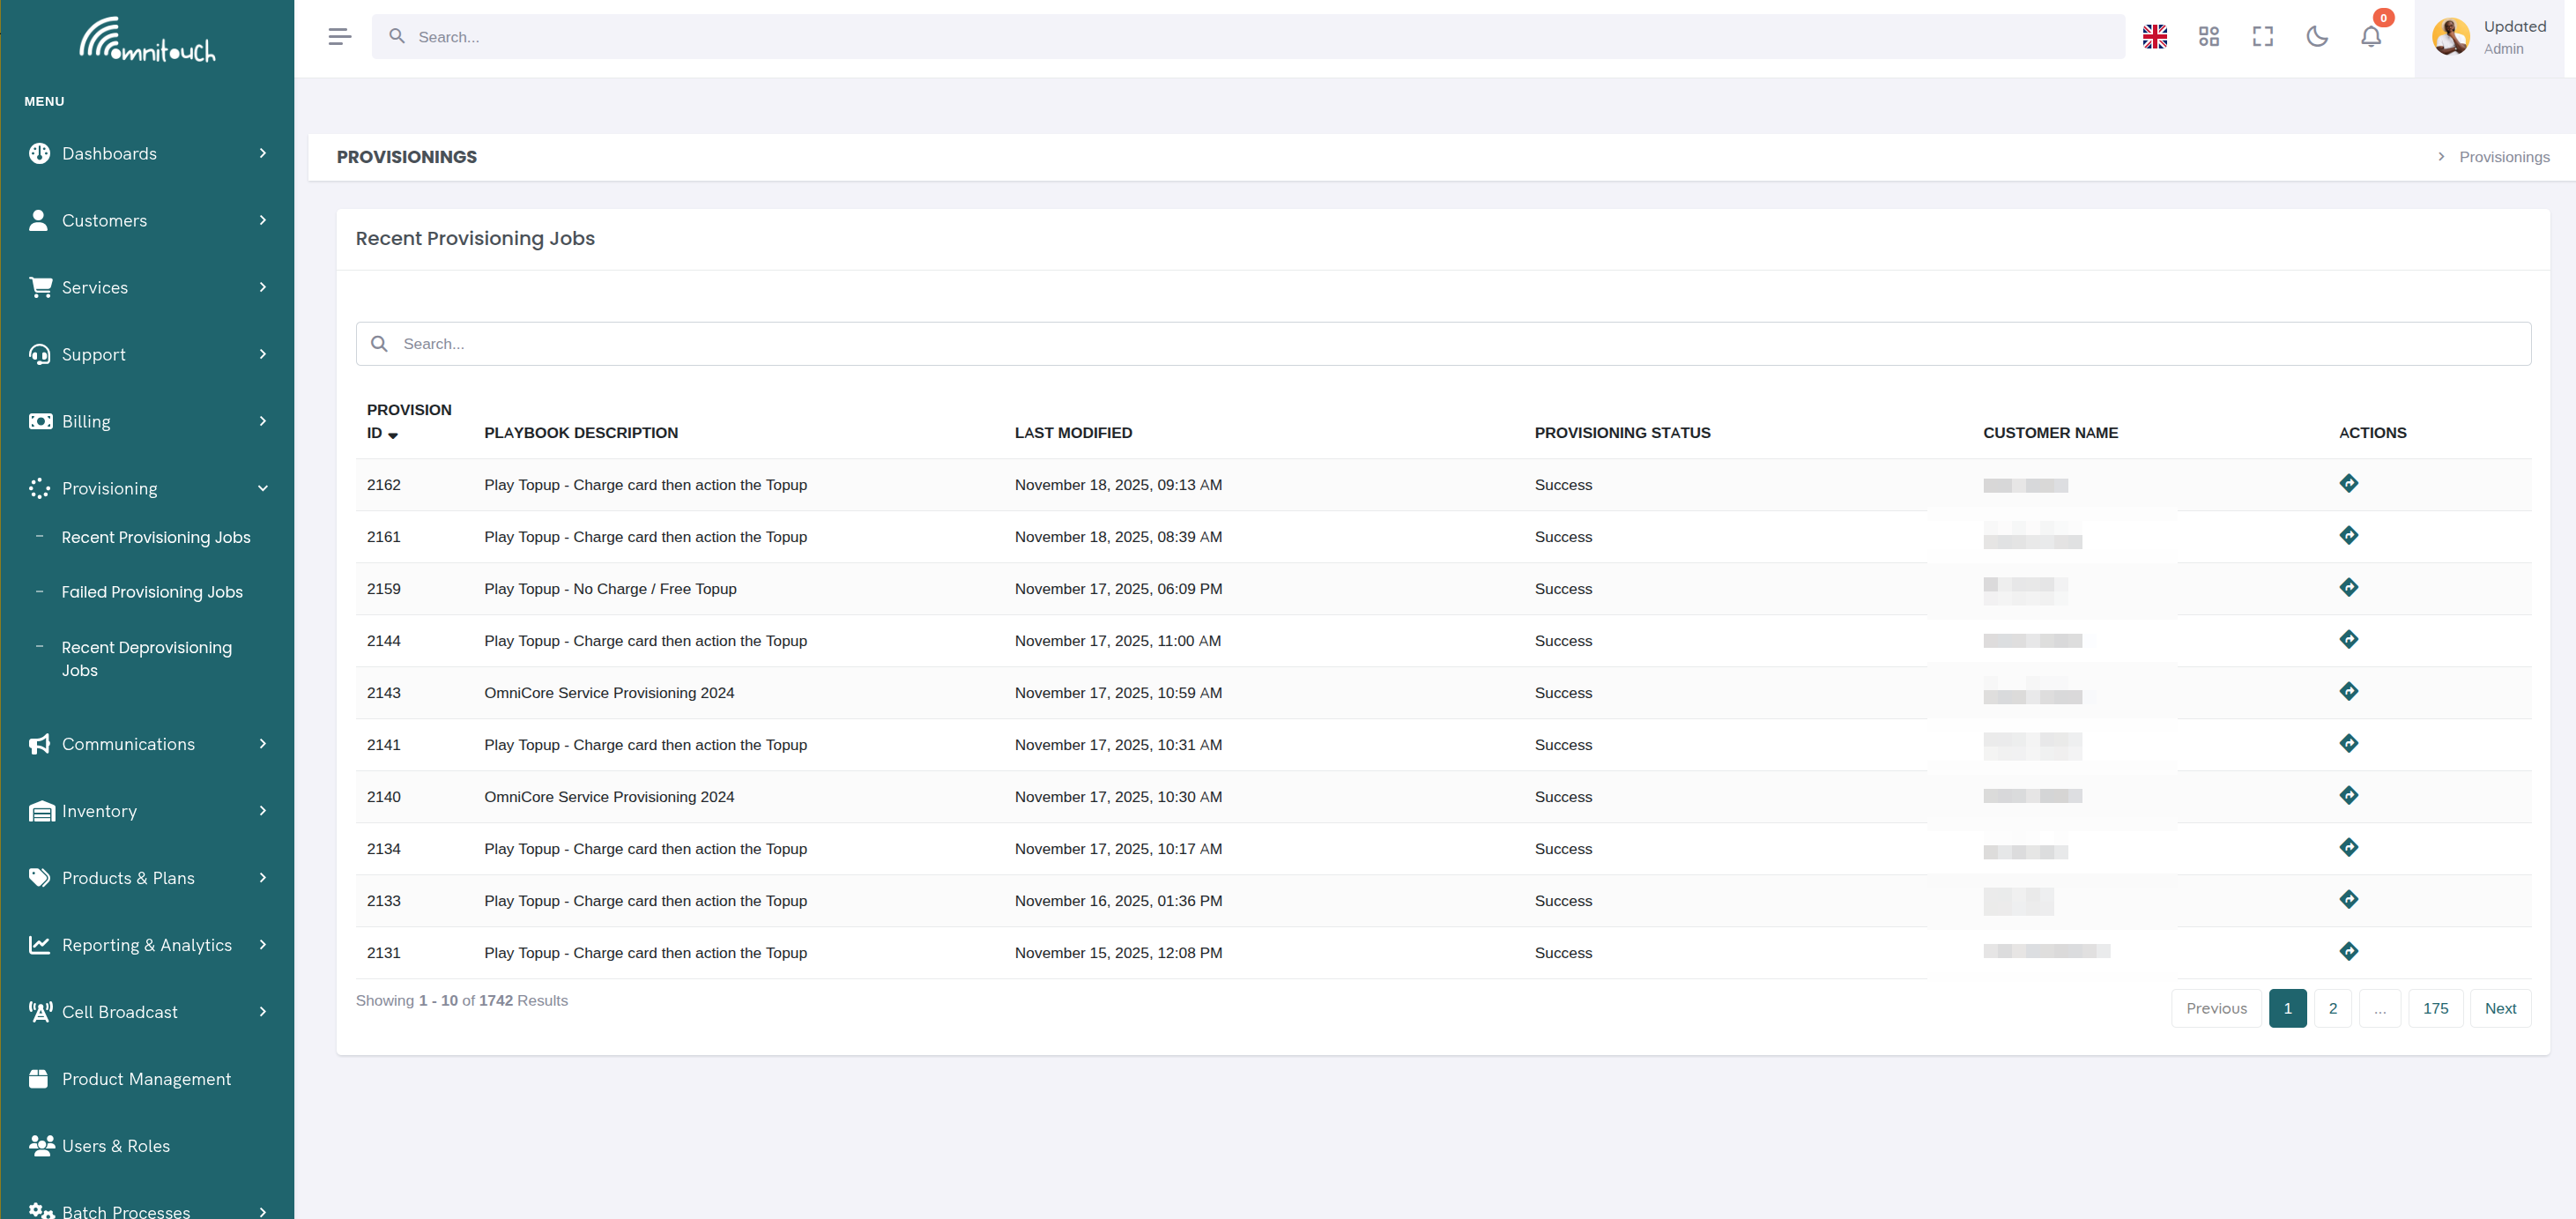
Listing Provisioning Jobs
To get a paginated list of all provisioning jobs:
GET /crm/provision/?page=1&per_page=20&sort=provision_id&order=desc
Authorization: Bearer <token>
Supports filtering:
GET /crm/provision/?filters={"provisioning_status":[2]}&search=Mobile
Authorization: Bearer <token>
This returns only failed jobs (status 2) where the description contains "Mobile".
Best Practices
Playbook Design
- Always use block/rescue: Ensure partial provisioning can be rolled back
- Use ignore_errors judiciously: Only for truly optional operations
- Log important variables: Use
debugtasks to log key values for troubleshooting - Validate responses: Use
assertto check API responses are as expected - Idempotency: Design playbooks to be safely re-runnable
Authentication
- User-initiated provisioning: Always use refresh_token for long-running playbooks
- Automated provisioning: Use IP whitelist or API keys with generated access tokens
- Token expiry: The refresh_token ensures access tokens are regenerated as needed
Error Handling
- Provide context: Include customer_id, service_id, and operation details in error messages
- Notify appropriately: Critical failures trigger emails, but don't spam for expected failures
- Debugging info: Capture full request/response bodies in Provision_Event records
Security
- Validate inputs: Check customer_id, product_id, service_id before provisioning
- Permission checks: Verify users can only provision for authorized customers
- Sensitive data: Use the redaction system to strip passwords/keys from logs
- IP whitelisting: Restrict simple_provision endpoints to trusted systems only
Performance
- Background execution: Never block API responses waiting for provisioning
- Polling intervals: UI should poll for status updates every 2-5 seconds
- Parallel tasks: Use Ansible's native parallelism for independent operations
- Database updates: Event handler updates the database in real-time, no need to query during execution
Related Documentation
concepts_ansible- General Ansible provisioning conceptsconcepts_api- CRM API authentication and usageconcepts_products_and_services- Product and service definitionsadministration_inventory- Inventory management for provisioning